
구글 로그인 OAuth를 사용하기 위해 프로젝트에 도입하려했던 라이브러리는 react-google-login였으나, 테스트 도중 웹용 Google 로그인 자바스크립트 플랫폼 라이브러리는 2023년 3월 31일 이후에는 지원이 중단된다는 것을 알았다.
새로운 Google Identity Services for Web을 사용하여 간편하게 구글 로그인을 시도해보자.
*사전준비: 구글 로그인을 구현하기 위해선 Google API 클라이언트 ID를 받아와야 한다.
그리고
사용자가 로그인할 수 있는 페이지에 클라이언트 라이브러리를 로드해야 하기에 Use the following code snippet:
<script src="https://accounts.google.com/gsi/client" async defer></script>anync 와 defer 속성을 사용하여 스크립트를 로드하면 페이지의 로딩 속도를 최적화할 수 있다.
App.js
function App() {
  function handelCallbackResponse(res) {
    console.log("Encoded JWT ID token: " + res.credential);
  }

  useEffect(() => {
    /* global google */
    google.accounts.id.initialize({
      client_id: clientId,
      callback: handelCallbackResponse,
    });

    google.accounts.id.renderButton(document.getElementById("signInDiv"), {
      theme: "outline",
      size: "large",
    });
  }, []);
  return (
    <div className="App">
      <div id="signInDiv"></div>
    </div>
  );
}
google.accounts.id.initialize(IdConfiguration)
configuration object를 기반으로 google client에 로그인을 초기화 한다.
- 동일한 웹 페이지에서 여러 모듈(원탭, 개인 설정 버튼, 해지 등)을 사용하는 경우에도 google.accounts.id.initialize 메서드를 한 번만 호출하면 된다.
- google.accounts.id.initialize 메서드를 여러 번 호출하면 마지막 호출의 구성만 기억되고 사용된다.
useEffect를 모든 렌더 후에 실행되게끔 하고 구글 클라이언트로 로그인을 초기화한다.
client_id와 callback함수를 받는다. callback 함수인 handelCallbackResponse는 Api로부터 받은 데이터 중 하나인 credential을 출력하도록 했다. 앱을 실행하면 구글 로그인 버튼이 출력되고 클릭하면 로그인을 진행할 수 있다.
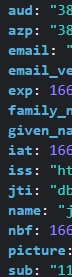
성공적으로 로그인이 되면 콘솔에 json 웹 token이 출력될 것이다. jwt token안에 거대한 정보들이 숨겨져 있다.
이것을 해독해주는 라이브러리를 설치해보자.
$npm install jwt-decode

#또는

$yarn yarn add jwt-decode해당 라이브러리를 사용하여 전송되는 json web token을 object형태로 변환해야 한다.
// handelCallbackResponse
let userObject = jwt_decode(res.credential);
console.log(userObject);jwt_decode를 import하고 콘솔을 확인해보면 로그인한 아이디의 수 많은 정보가 객체의 형태로 들어온 것을 확인할 수 있다.
function App() {
  const [user, setUser] = useState({});
  const { name, email, picture } = user;

  function handelCallbackResponse(res) {
    let userObject = jwt_decode(res.credential);
    console.log(userObject);
    setUser(userObject);
  }

  useEffect(() => {
    /* global google */
    google.accounts.id.initialize({
      client_id: clientId,
      callback: handelCallbackResponse,
    });

    google.accounts.id.renderButton(document.getElementById("signInDiv"), {
      theme: "outline",
      size: "large",
    });
  }, []);

  // If we have no user: sign in button
  // If we have user: show the log out button
  return (
    <div className="App">
      <div id="signInDiv"></div>
      {user && (
        <div>
          <img src={picture}></img>
          <h3>{name}</h3>
          <h5>{email}</h5>
        </div>
      )}
    </div>
  );
}
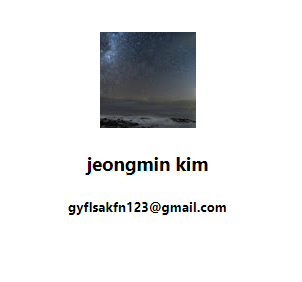
나의 정보가 보기 좋게 출력되었다. 로그아웃 또한 구현해보자.
function App() {
  const [user, setUser] = useState({});
  const { name, email, picture } = user;

  function handelCallbackResponse(res) {
    let userObject = jwt_decode(res.credential);
    console.log(userObject);
    setUser(userObject);
    document.getElementById("signInDiv").hidden = true;
  }

  function handleSignOut() {
    setUser({});
    document.getElementById("signInDiv").hidden = false;
  }

  useEffect(() => {
    /* global google */
    google.accounts.id.initialize({
      client_id: clientId,
      callback: handelCallbackResponse,
    });

    google.accounts.id.renderButton(document.getElementById("signInDiv"), {
      theme: "outline",
      size: "large",
    });

    google.accounts.id.prompt();
  }, []);

  // If we have no user: sign in button
  // If we have user: show the log out button
  return (
    <div className="App">
      <div id="signInDiv"></div>
      {Object.keys(user).length !== 0 && (
        <button onClick={(e) => handleSignOut(e)}>SignOut</button>
      )}
      {user && (
        <div>
          <img src={picture}></img>
          <h3>{name}</h3>
          <h5>{email}</h5>
        </div>
      )}
    </div>
  );
}로그아웃 버튼을 반환하는 조건에서 빈 객체는 true로 평가되기 때문에 Object.keys(user)하여 user의 값을 검사했다.
이번엔 access_token을 사용하여 다른 API의 정보를 불러와보자.
작성자는 Google 로그인을 하여 Youtube API의 구독 목록을 불러올 예정이다.
  const [tokenClient, setTokenClient] = useState();

   const handleLogin = () => {
    tokenClient.requestAccessToken();
  }

   useEffect(() => {
    const google = window.google;
    setTokenClient(
      google.accounts.oauth2.initTokenClient({
        client_id: CLIENT_ID,
        scope: SCOPES,
        callback: (tokenResponse) => {
          // 모든 구글 API에 사용할 수 있는 라이브 토큰에 접근할 수 있다.
          console.log(tokenResponse);
        }
      })
    );
  }, []);

  return (
    <>
      <button onClick={handleLogin}>Google Login</button>
    </>
    );
initTokenClient가 리턴하는 것을 token client이기에 state에 저장하여 사용하게끔 하였다. 이렇게 하면 react component 어디서든 token client를 호출하는 것을 허용한다.

버튼을 클릭하여 console로 출력되는 내용을 살펴보면 access_token, scope, token_type 등등이 있다. 해당 내용을 가지고 Youtube API에 접근할 수 있게 된다.
  useEffect(() => {
    const google = window.google;

    setTokenClient(
      google.accounts.oauth2.initTokenClient({
        client_id: CLIENT_ID,
        scope: SCOPES,
        callback: (tokenResponse) => {
          // 모든 구글 API에 사용할 수 있는 라이브 토큰에 접근할 수 있다.
          if (tokenResponse && tokenResponse.access_token) {
            const headers = {
              'Content-Type': 'application/json',
              'Authorization': `Bearer ${tokenResponse.access_token}`
            }
            const commonparam = {
              part: 'snippet',
              mine: true,
            }
            axios
              .all([axios.get("https://www.googleapis.com/youtube/v3/subscriptions", {
                headers: headers,
                params: {
                  ...commonparam,
                  maxResults: 20
                }
              }), axios.get('https://youtube.googleapis.com/youtube/v3/channels', {
                headers: headers,
                params: {
                  ...commonparam,
                }
              })])
              .then(axios.spread((res1, res2) => console.log(res1, res2)))
          }
        }
      })
    );

    // google.accounts.id.prompt();
}, []);useEffect의 내용을 한번 실행하면서 tokenClient에 접근할 API의 토큰 정보가 담기고 버튼을 클릭하여 Event가 발생했을 때 tokenClient.requestAccessToken();이 실행되며 initTokenClient의 callback의 tokenResponse에 위 사진처럼 token에 대한 정보가 담기게 된다. 유튜브의 구독 정보와 채널 정보를 불러오기 위해 axios의 멀티 Request를 사용하였다.

채널 정보과 구독 정보가 담긴 두 데이터가 정상적으로 출력되었다.
해당 토큰에 대한 자세한 정보는 👉 링크에서 확인하자.
+ useEffect는 최후의 수단으로 사용하는 것이 좋다. 위의 내용을 충분히 이벤트 핸들러로 처리할 수 있다는 것을 명심하자.
'개발자의 공부 > React' 카테고리의 다른 글
| [React]useRef (0) | 2023.01.28 |
|---|---|
| [React]Page Routing(v6.4) (0) | 2022.11.28 |
| [React]useContext (0) | 2022.11.15 |
| [React]Purity and Side Effect (0) | 2022.11.08 |
| [React]useEffect (0) | 2022.11.08 |